
In my last blog post I wrote about setting up WireGuard server on my USG. One thing that many of us home users have in common that we have dynamic ip addresses that change time to time. This can be troublesome when using the VPN as the IP can change any time and normally it happens when you would actually need the VPN working 🤪 Luckily this problem has been solved long time ago with dynamic DNS. The system works so that you have a daemon running in your server and when the ip address changes it updates the new ip address to the dynamic dns record. This makes it feel like you have a static ip address to which you have assigned a hostname.
I chose Namecheap for the service to run my dynamic DNS. I would have liked to use Cloudflare but there was no direct support for it in USG. Also all CLI setups seemed a little too complicated to have as a persistent setup. To be able to setup dynamic DNS via Namecheap you need to have a Namecheap account and a domain hosted with them. When you have these here are the steps that you can follow to get it working.
On the Namecheap side you need to do the following:
- Login to your Namecheap account
- Click manage on the domain you want to use
- Go to Advanced DNS
- Activate Dynamic DNS service and save the password for later use
- Add a A+Dynamic DNS Record type of record
- If you want to use naked domain use @ as the host. Otherwise use a subdomain of your choice.
- Add 127.0.0.1 as IP address. This will be replaced with a real IP address by the dyndns daemon.
- Remember to save changes by clicking the green save changes icon
On the USG contoller you need to do the following:
- Login to your USG contoller
- Navigate to Settings > Services > Dynamic DNS
- Press Create new dynamic DNS button
- Insert the following details
- Select the WAN interface that you are using
- Select namecheap from the Service list
- Add @ as the hostname or the subdomain you setup earlier in Namecheap
- Use your domain as the Username
- Use the Dynamic DNS service password that you saved earlier
- Use dynamicdns.park-your-domain.com as the Server
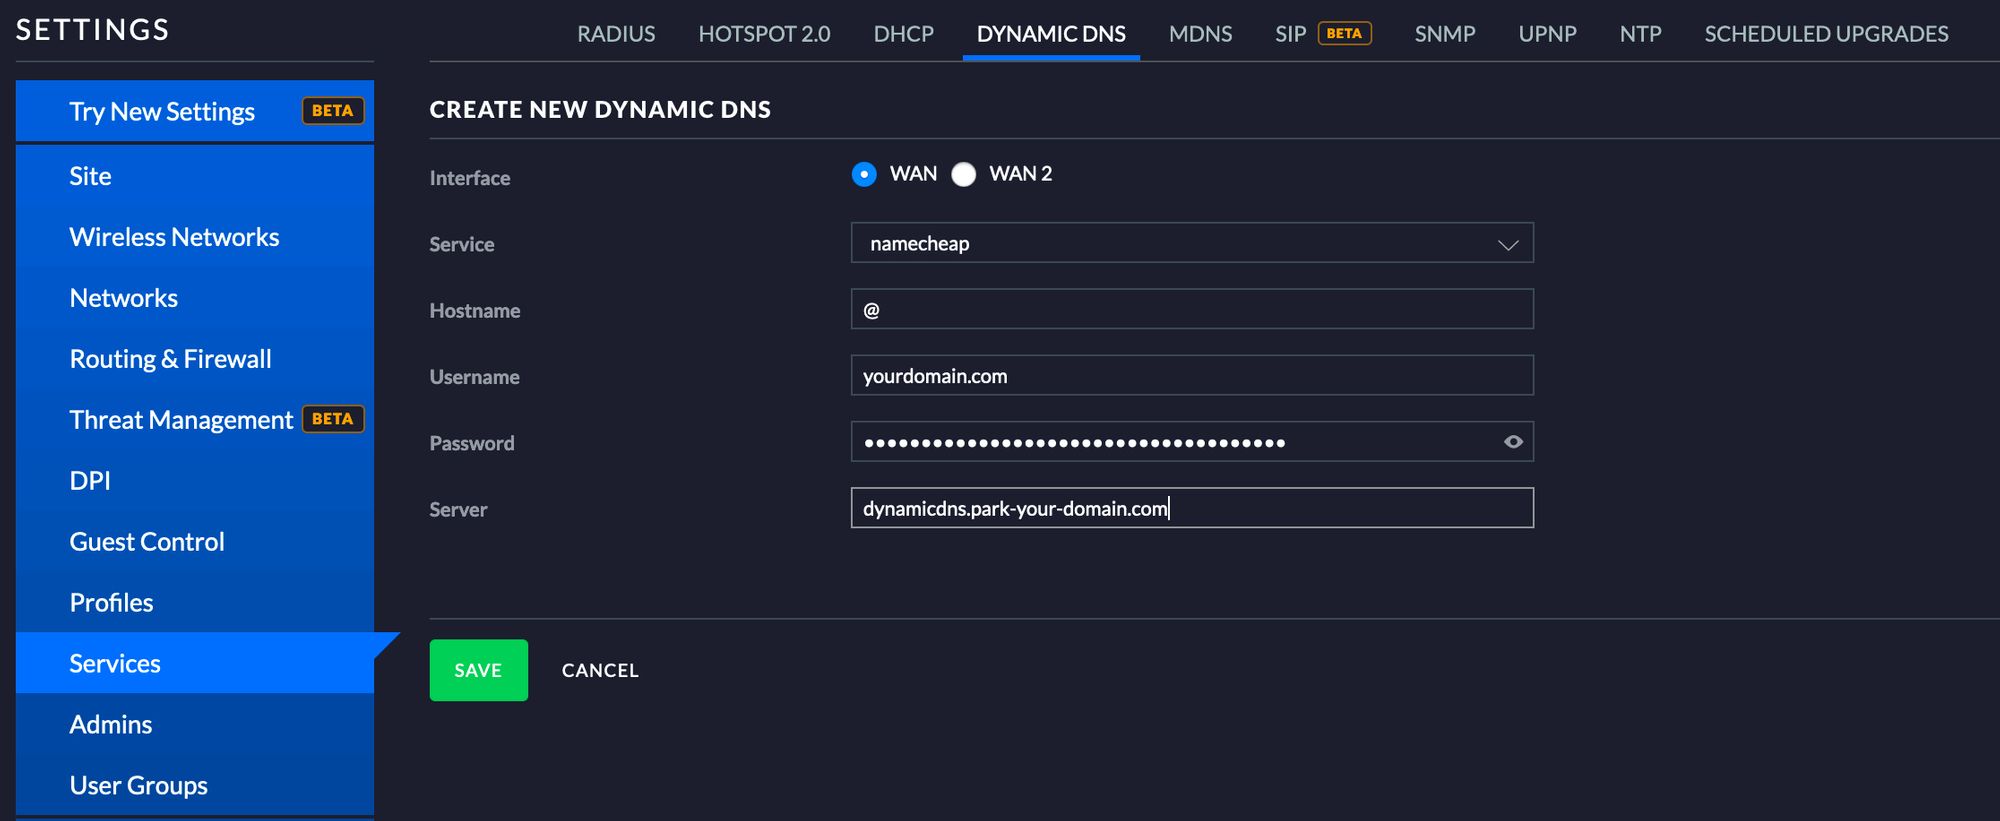
- Click save and you should be all setup!

Comments powered by Talkyard.